Photobucket Photobucket Photobucket Photobucket

July 25, 2012

Manis, Pedis, & Bubbly!

I am no stranger to "Girl's Only" parties as you have seen with my Makeovers & Martinis party hosted by Mary Kay. My friends and I were due for some girl time so I decided to put together a Manis, Pedis, and Bubbly Nail Salon day at my all time favorite salon: Top Nails in Queen Anne, WA. 

The party was so relaxing and could not have come at a better time. My favorite part of the party was the dessert table I created...nothing but sweets...JUST WHAT I NEED, RIGHT?! In preparation for the party, I visited The Cookie Cutter Company and searched high and low for a nail polish shaped cookie cutter...it was a success!


Nail Salon parties are so easy to coordinate, just block up a couple of hours at your favorite nail salon, call up some girl friends, grab some sweets and bubbly, and make it a party!

xoxo

Recipe of the Day: Ice Cream Cakes!

I love the 4th of July and it is just so fun to decorate..the colors are easy and simple: red, white, and blue! However, one thing that I couldn't believe was so simple was a dessert that has become my favorite thing to make: ICE CREAM CAKES!

Ingredients:
  • Cake Mix (any flavor, for this example I used Funfetti)
  • Ice Cream cones
  • Frosting (buttercream is my fave!)
  • Cream cheese
  • Optional: sprinkles and other cake decorations!
How to Make Ice Cream Cakes:

Step 1: Grab your favorite store bought cake mix and bake it. Let cool

Step 2: In a large bowl, proceed to mush the cake mix adding in spoonfuls of cream cheese until the texture is moldable.

Step 3: Place the bowl in the freezer for 2 hours to let the mixture firm up.

Step 4: Form about two golf ball sizes of the mixture together and press it into the ice cream cone. Frost and decorate accordingly! 

A simple treat that will NOT melt ;-)

xoxo!

Dessert Table by: Party with a K

July 7, 2012

Plan your Graduation Party...QUICK!


So you've been on the fence about having a big party to celebrate graduating and you finally caved in and decided to hold a bash. Make it simple on yourself and plan the perfect Grad Party that requires little to no effort. How you might ask can this be done....one answer: Party Rental company.

For my graduation I used a very affordable rental company in Scottsdale, AZ called Party People. Much like other party rental companies they had EVERYTHING from tables to table cloth linen right down to chairs, napkins, and beautiful party pieces and figurines to decorate your area with.

Keep your party simple yet sophisticated by incorporating these elements in your party:

(1) Choose the 2-3 main school colors from the school you're graduating from to incorporate in all of your decor. For example use the solid colors of your school as color choices for linen on the tables.
(2) Rent a couple of round tables to have in your backyard for people to sit at. I would suggest round tables to seat 6-8 with white rosen chairs (classy looking).
(3) Be sure to have a separate rectangular table to display YOU.

Have Grad photos, your graduation stole, grad cap, various rewards, and pictures on the table. Tie some balloons at the end of the tables to make it stand out as a focal point to the party.
(3) GET YOUR FOOD CATERED. Local grocery stores have great deals on sandwiches, meats, fruit platters, vege platters, and desserts.
(4) Say NO to cheap decorations from Party stores.

Stick to incorporating your school colors with minimal balloons, streamers, table confetti, and plates and napkins.
(5) Make sure you have music playing...Pandora is always a safe route if you have a mixed crowd coming.

CONGRATULATIONS CLASS OF 2011!!

A "Minnie" Occasion


I have always wanted to have a Minnie Mouse themed party, so I decided to use my birthday as the perfect excuse to have one. Now, I had devoted so much time to my Kare Bear 24th Birthday Slumber Party, that it only left me with a few days to put some decor together. When I say a few days, I mean less than 24 hours before my Minnie Mouse themed event!! Here's how you can decorate for a simple Minnie Mouse themed birthday party in less than 24 hours!


The first step in planning a Minnie Mouse themed party is to decide what colors you would like to work with. There are two different colored hair bows that she wears: red & pink. Be it that I am one of the most indecisive people, I decided to use both colors incorporating white & black as accent colors.

Now that you have the colors picked out there are three places you must visit to complete the Minnie Mouse look: Party City (or your closest party store), Michaels (or your closest craft store), and a candy or grocery store near you.

Items to retrieve at the Party Store:
  • 25 balloons (red, pink, black, & white)
  • Set of ribbon
  • Helium tank
  • Minnie Mouse paper hats
  • Minnie Mouse ears
  • Red, black, pink, & white streamers
    
Mayflower Balloons 44227 Minnie Mouse Bouquet (Google Affiliate Ad)

Items to retrieve at Michaels:
  • A set of polka dotted paper that includes red, pink, and black
  • A set of pink and red paper
  • Polka dotted ribbon that has red and pink as the base with the polka dots white
  • Red & pink candy bags
  • Minnie Mouse stickers
  • Assorted glass jars (medium to small in size)
  • Bag of gems that include pink & red
  • Ready-to-stick black letters
  • White, red, pink, and black paper lanterns

Items to retrieve at the candy store or grocery store:
  • Red, pink, white, and black candy or assorted loose candy that can easily be poured into glass jars.
  How to Use What You've Got!

So you have all your supplies, now it's time to put them together! Below are a couple ways in which you can decorate your party.

Minnie Face

The quickest way to decorate your party fitting to the theme is to make Minnie faces that can be placed throughout the party. Simply take your black with white polka dot construction paper, a bowl, and a pencil, and trace the large part of the bowl onto the paper. With a smaller circular shape, trace it onto the same paper. These circles will serve as a face and ears. Take your red, pink, or red/pink polka-dotted and cut it into a bow.Affix a cute button or cotton ball in the middle of the bow and you're Minnie face is complete. Glue a

Glue a Popsicle stick to the back of the Minnie face and stick it into styrofoam so it can serve as a center piece. OR, string fishing line through the top of the face and hand the Minnie faces from the ceiling.

Paper lanterns

Hang these from a ceiling and even cuter, place Minnie ears on it!
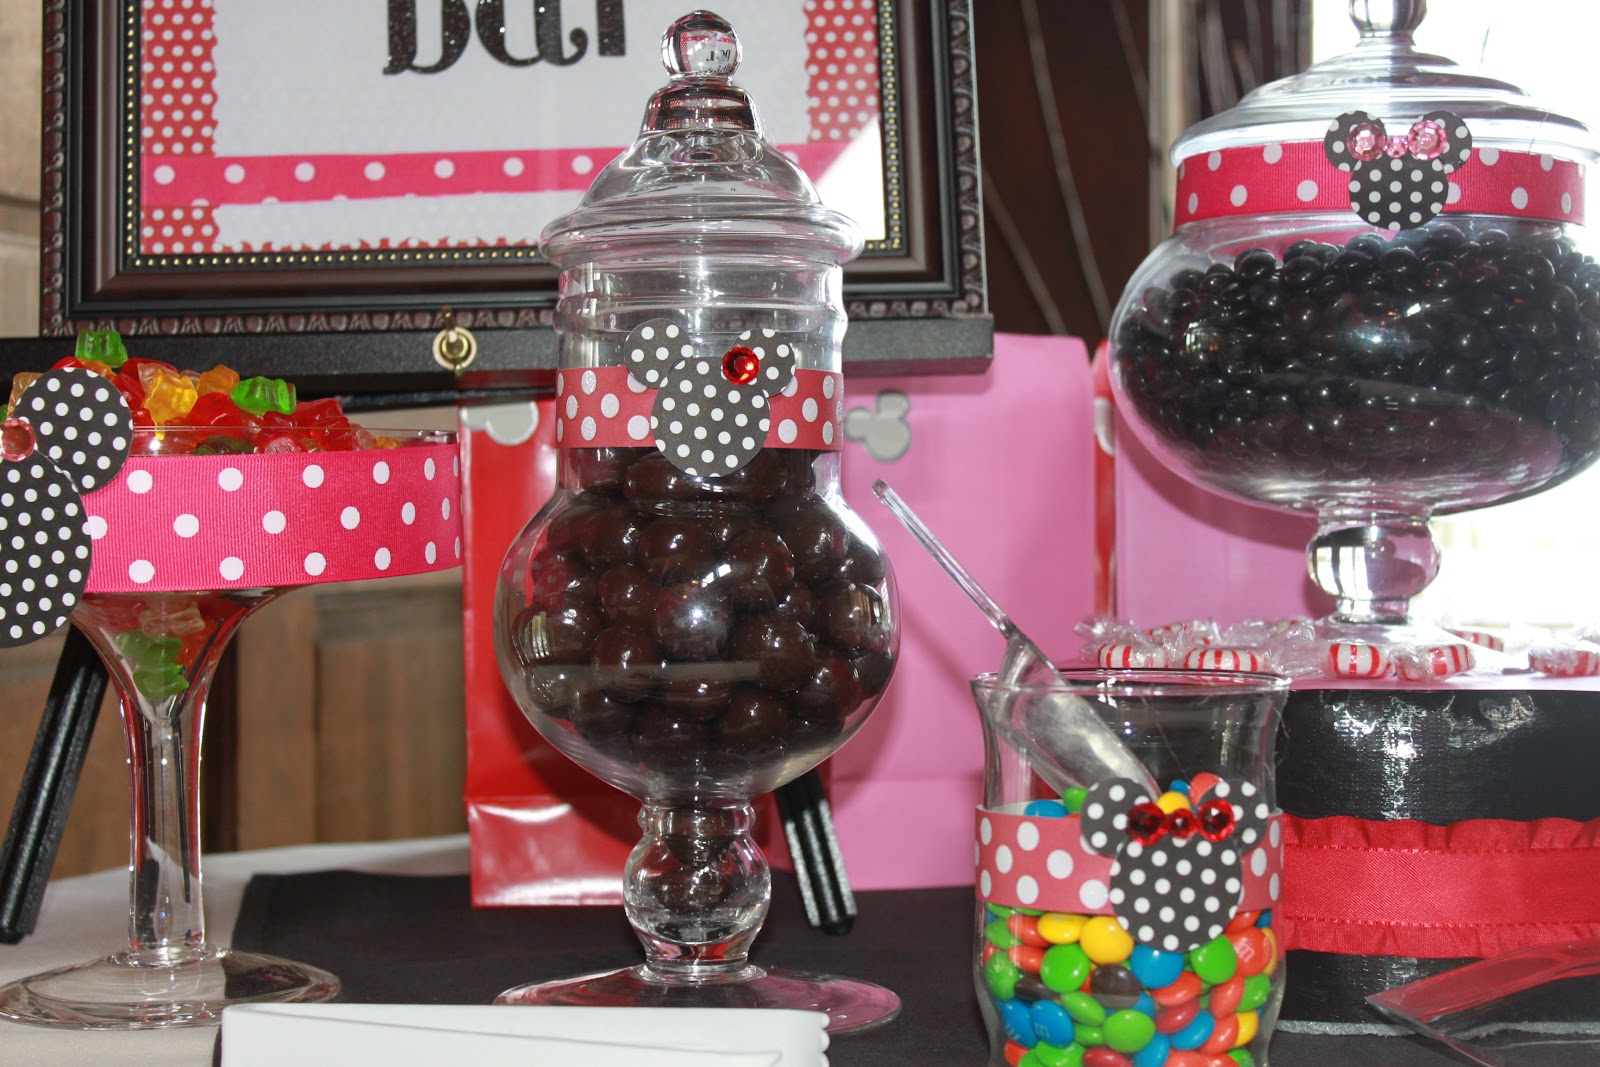
 
Candy Buffet 

With your candy jars, fill them with candy! Affix cute Minnie Mouse stickers and ribbon to the jars and candy bags.


 Of course, don't forget signage!


Table Centerpieces

For all the tables at your party, the remaining paper lanterns, Minnie ears and gems can be placed as table decor. See the picture below for an example.


Balloons

Have fun with these! Couple them in threes with red, pink, and white in one bundle. Strewn them across the room!
                                

ENJOY YOUR MINNIE PARTY :-)